⭐Must-Have Products I Use & Recommend!⭐
Personal Note
I personally use and love these products in my kitchen. I only recommend what I trust!
I personally use and love these products in my kitchen. I only recommend what I trust!


Disclosure: This post contains affiliate links. If you click and make a purchase, I may earn a small commission at no extra cost to you.
There's something truly magical about springtime. The air feels fresher, colors pop a little brighter, and suddenly you’re craving lighter, more vibrant flavors. As someone who finds endless joy in crafting experiences around food, I find that a thoughtfully composed cheese board captures that very essence of the season! Picture this: a canvas of creamy, tangy, and sharp cheeses, dotted with the juicy sweetness of ripe berries, the crunch of pistachios, and maybe even a swirl of honey. It isn't just food. Its an invitation to savor the moments that make this time of year so special.

I still remember the first time I attempted a cheese board. I was so intimidated! I thought it needed to be incredibly fancy, expensive even. Turns out, the best cheese boards are those that reflect your personal taste and what’s seasonally available. Dont stress about having every single cheese imaginable. Pick a few you really love and build from there. For a spring cheese board, I really enjoy incorporating cheeses like a creamy goat cheese, a tangy havarti, and perhaps a sharp cheddar to balance the sweetness of the season's fruits. And honestly a cheese baord is a pretty easy and relaxing meal to prepare and you could serve it with some of your favorite wine. It's the best!

Required Equipments
- Wooden board
- Cheese knives
- Small bowls
- Serving spoons
- Cutting board
Spring Cheese Board: Dairy Bloom: Frequently Asked Questions
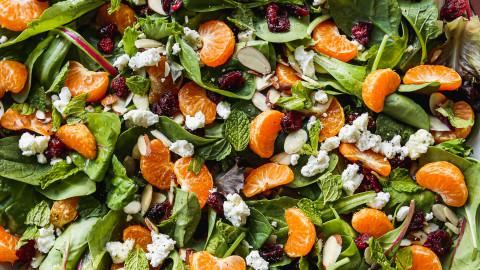
Spring Cheese Board: Dairy Bloom
Celebrate spring with a stunning cheese board! This 'Dairy Bloom' features a vibrant array of cheeses, fresh fruits, and crunchy nuts, perfect for gatherings or a delightful personal treat.
⏳ Yield & Time
Yield: 4 servings
Preparation Time: 15 minutes
Cook Time: 0 minutes
Total Time:
🍽 Ingredients
📖 Instructions
- Gather your board: Select a wooden board, slate board, or even a large platter. Size depends on how many you’re serving. I adore my round acacia wood board. It has a nice organic feel. So you could try that!
- Choose your cheeses: Aim for 3-5 different cheeses, offering a variety of textures and flavors. Consider a soft cheese (like brie or goat cheese), a semi-hard cheese (like Havarti or Gouda), and a hard cheese (like cheddar or Parmesan).
- Prep the cheeses: Remove cheeses from the refrigerator about 30 minutes before serving to allow them to come to room temperature, enhancing their flavor. Cut larger cheeses into wedges or slices.
- Add fruits: Incorporate seasonal fruits like strawberries, blueberries, raspberries, and grapes. You can also add dried fruits like apricots or cranberries for textural contrast.
- Include nuts and seeds: Walnuts, almonds, pistachios, and pumpkin seeds add a delightful crunch. Toast them lightly for enhanced flavor.
- Add savory elements: Olives, pickles, artichoke hearts, or cured meats (like prosciutto or salami) provide a savory counterpoint to the sweet fruits and creamy cheeses.
- Include spreads and dips: Honey, fig jam, or olive tapenade add another layer of flavor and can be paired with different cheeses.
- Add crackers and bread: Offer a variety of crackers, baguette slices, or breadsticks. Consider gluten-free options as well.
- Arrange the board: Start by placing the cheeses on the board, spacing them out evenly. Then, fill in the gaps with fruits, nuts, savory elements, and spreads. Arrange crackers and bread around the edges or in separate bowls.
- Garnish (optional): Add a touch of freshness with sprigs of rosemary, thyme, or edible flowers.
- Serve and enjoy: Encourage guests to mix and match flavors and textures. Have small knives or spreaders available for each cheese. And most importantly have fun while preparing the snack, and even more while eating it!
📝 Notes
🍎 Nutrition
Calories: 350 kcal
Protein: 15 g
Fat: 25 g
Carbohydrates: 20 g
Fiber: 3 g
Calcium: 200 mg